Hi Dolls! I'm bringing you another blog design post today for all you design do-it-youself-ers out there.
It actually took me quite a long time to figure out how to do this one properly, so I'm going to save you some time if this is something you're interested in.
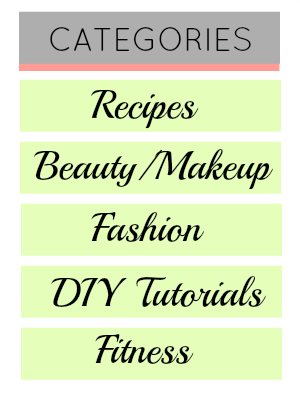
Over to the left you can see I provided an example of what I mean. These categories will link to previous posts of yours by searching for specific labels. The gadget will help readers find exactly what they are looking for in an organized manner.
1. First things first, make sure each of your posts that you want linked to these categories have "labels" attached to them. To do this, go to your blogger dashboard and click on the drop down arrow, then click "posts". (If you already done this, skip this step).
Click on the check box to the left of the post. Then, "Label selected posts" above. Add a new label of whatever describes that post.
2. Now, you need to create the separate images. The example I have shown above shows the final product. You can make as many categories as you want, but you need to create and save them ONE AT A TIME. To create these images, you will be using picmonkey.com like the rest of my tutorials. Find out to do that HERE. One of my images for my blog looks like the one below:
3. Time to upload all of the images for your categories to a host site. I use photobucket.com for all of my tutorials. It works really well for what we are doing. See THIS POST if you are unsure of how to do this. Upload all the images, and then sit tight. We will use the direct links for the images in a minute.
4. We now need to add the code into your blogger layout. Go to layout and then add a gadget in your sidebar wherever you would like to the category list to appear. Add the "HTML" gadget. Copy and paste this code into the gadget:
<a href="http://www.YOURSITEURL.com/search/label/Design"><img border="0" alt="Photobucket" src="YOURDIRECTLINK" /></a>
Let me break this down a bit. The first part you need to add is self-explanatory. YOURSITEURL should be filled in with the URL of your own blog. The next part in pink I have as "Design" because as you can see, it matches the name of my Design image above. When people click on the Design image, I want all posts with the label "Design" to come up. KEEP IN MIND.... when you added your labels to posts, whatever you typed in has to exactly match what you type in for this code. Next you need to post your "direct link" of your image that you uploaded to photobucket in where it sasys YOURDIRECTLINK. This makes the image appear. To do this, go back to your first image in photobucket, and copy the direct link of that image.
Paste it into the code in the appropriate area.
5. PREVIEW your image. If it looks okay, click save. BUT you're not done. Since we have more than one image, you need to copy and paste the code into that SAME gadget multiple times. If you have 6 images, you should copy and paste it 6 times, one right after another. Do not add multiple gadgets and paste these codes separately.
For each image, you need to change the label that it searches for (for your Makeup image, change it to Makeup. Also, copy and paste each direct link of the different images.
When you've done this, SAVE and enjoy! It seems like a lot. But it's really easy. It just takes some explaining.
If you try it, let me know how it goes! I want to see your finished products :)
Good luck!
xo.


0 comments:
Post a Comment